Some products come in different shapes, sizes and colours. Depending on what you sell in your WooCommerce store you could have many different variations on a similar product. Product Attributes and Variations can help us organise your products more effectively.
Product attributes work in two ways. Firstly they add more information about a product. Secondly that information can then be used to create variable products.
Using Attributes to Organise
If you sell widgets that come in three different sizes. Small, Medium and Large you could make categories and assign them to the Widget category. Then you could choose a size category for each. But that would make your categories cluttered and difficult to sort through.
Instead you can create a Size attribute that you can assign a widget to.
To do this go to Products > Attributes. Here you create an attribute that can be applied to any product.
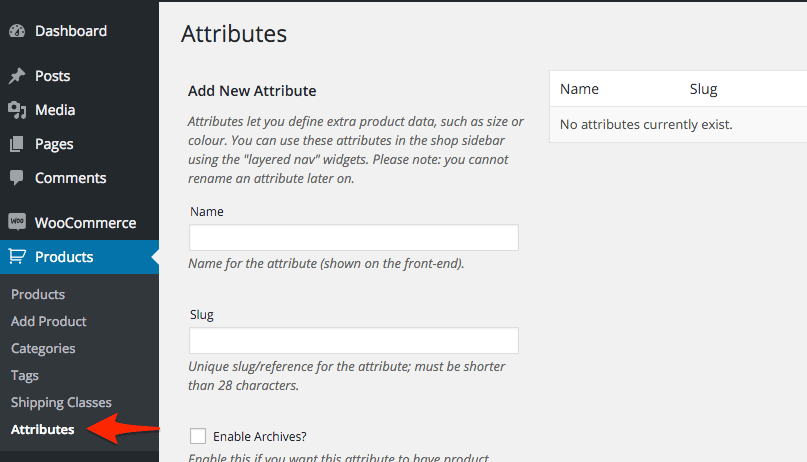
Give the Attribute a Name. In this case ‘Size’.
The Slug will generate automatically.
Enable archives if you want people to be able to search through all the widgets of a certain size.
Type. If it is on Select then you configure the the terms eg. Small, Medium, Large of the attribute first and then select them when on the product page. If it is Text then you could type in any term into the attribute. This would be useful for a measurement or weight. Or perhaps a model number.
Last you can select the order in which they appear in the catalogue.
Click the Add Attribute button to create it.
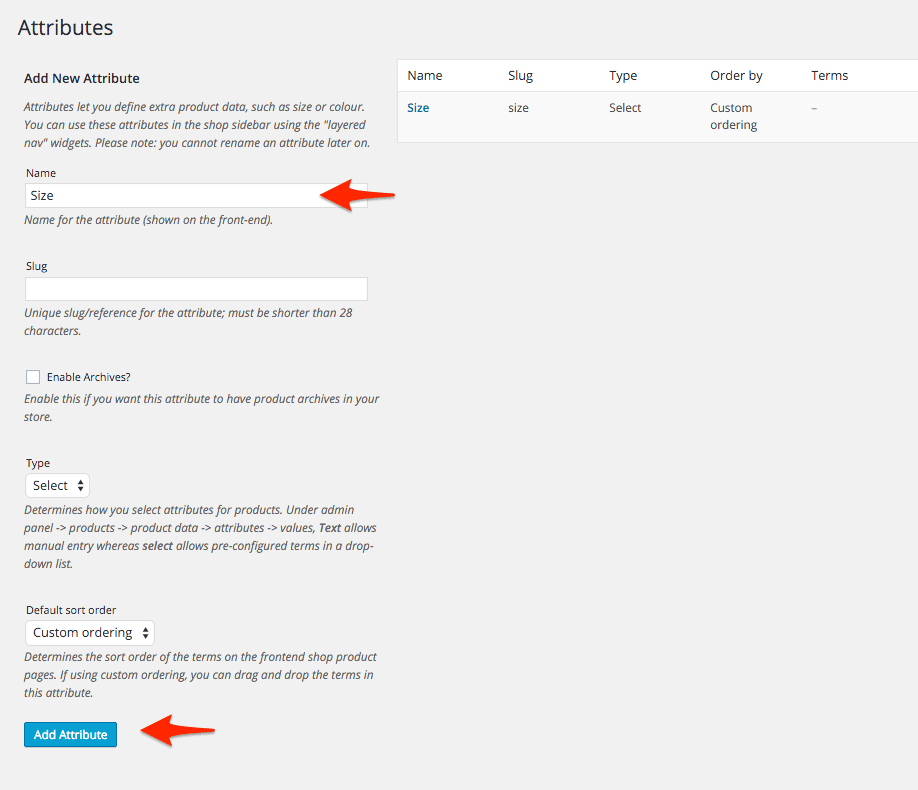
The Attribute will appear in the list at the top right. If you choose Select for the type you will need to create some terms first. Then your attribute to be able to choose from in the product area.
In the list click the configure icon at the right hand end of the list.

Here we can add terms to the Size attribute. The Attribute is Size and the terms will be the actual ‘sizes’.
So type in Small and click Add New Size.
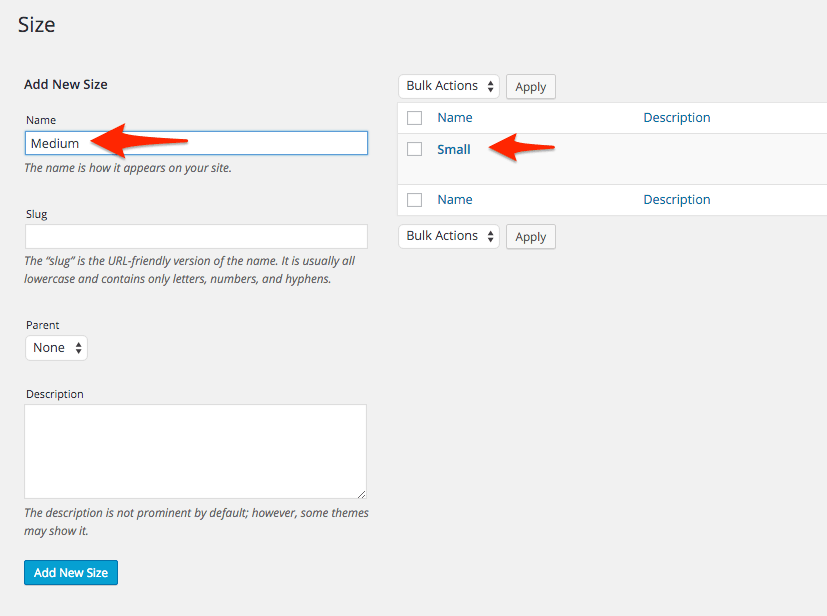
The Small size will appear in the list at the top right.
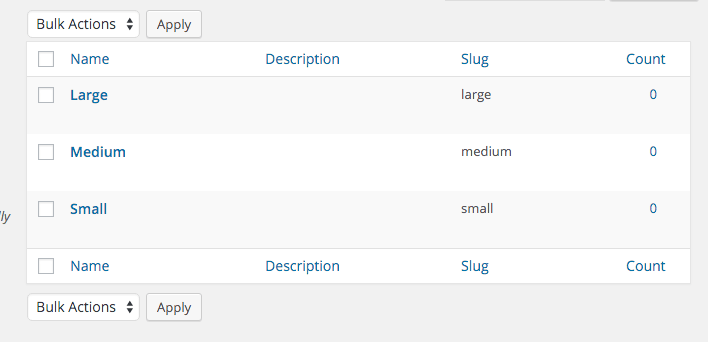
Repeat by typing in all the sizes you need and saving them. You can also organise them into parent – child relationships.
If we go and create a product the Size will be available to choose as an attribute.
Go to the Attributes tab in the Product Data box on the product page.
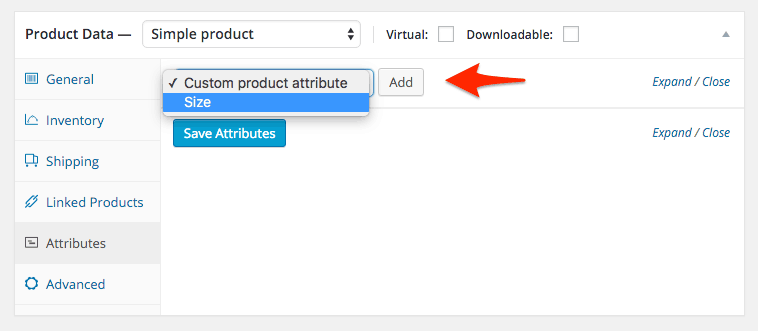
Select Size from the Custom Product Attribute drop down and click Add.
Now we can choose the attribute values that apply to this product. Click in the Value(s) box and you can choose Small, Medium or Large or add all.
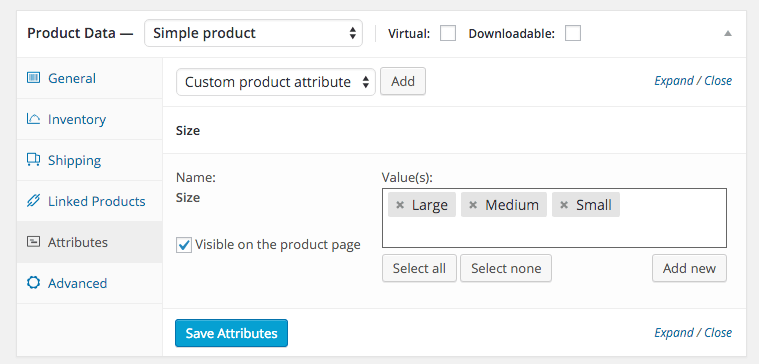
Clicking the Add New button will allow you to add a new term. For example if I forgot Extra Large I can add it here.
Click Save Attributes to save the sizes.
Now your attributes will inform customers about exactly what type of product you are selling. You can also install extensions that will make the attributes wearable and filterable.
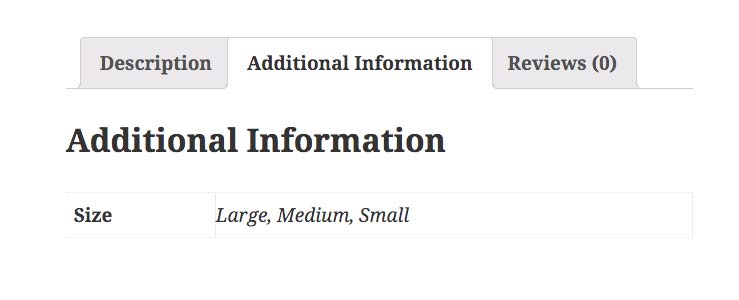
On the front end of the site the attributes will be under the Additional Information tab on the single product page.
Using Attributes for Variable Products.
You can also use attributes to create variable products. Variable products can have different colours, SKU’s, shipping costs and more.
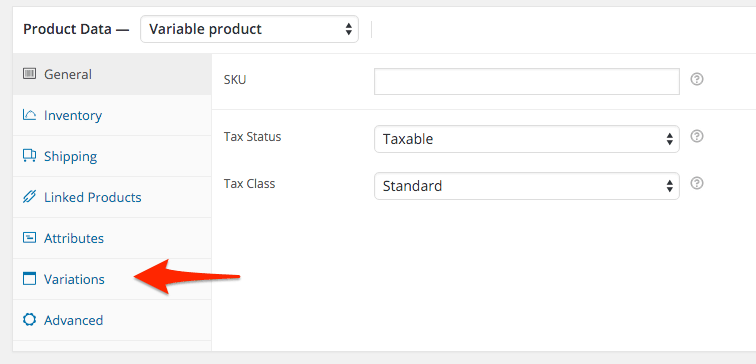
To make the product a Variable one go to the Product Data box and select Variable Product from the drop down.
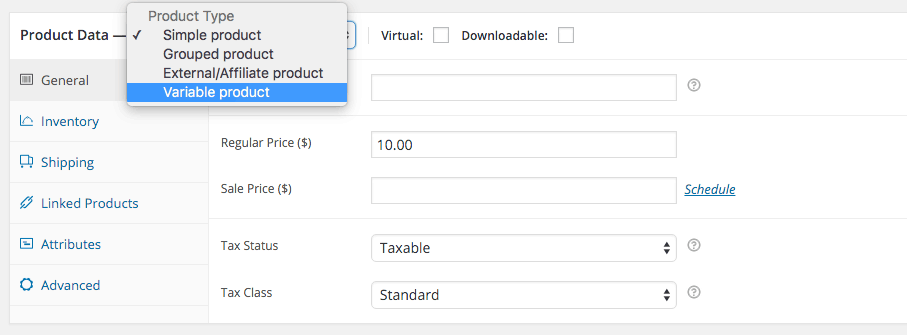
Now a Variations tab will be visible
First we need to add some attributes to base variations upon.
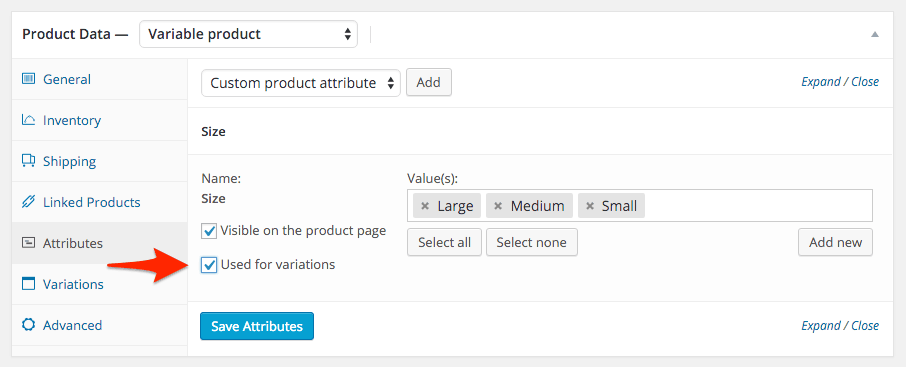
We have already created the Size attributes so we can use the. Choose size from the Custom Product Attribute drop down box.
It will appear below. Make sure you tick the Use for variations checkbox and save.
Go the the Variations tab. In the Add Variation drop down you can select Create variations from all attributes. You may get a warning. WooCommerce will generate variations based on every combination. This means if you have many attributes you can end up with many variations.

Click the Go button and the variation will generate. Now you can see Large, Medium & Small. Now we need to give them their own product data such as price, SKU etc.
Click the small arrow on the right next on the same line as the name of the attribute you want to add data to. This opens up it’s own Product Data box. Here you can give the variation a price, size, shipping cost and much more.
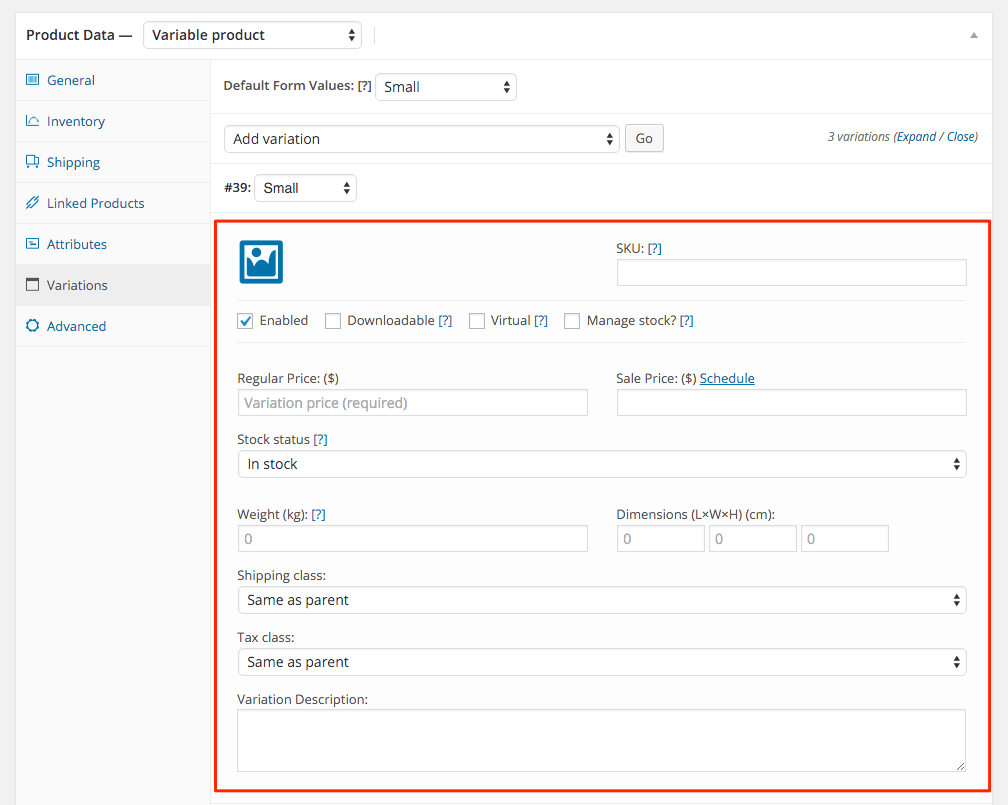
Do this for each variation and click the Save Changes button to save.
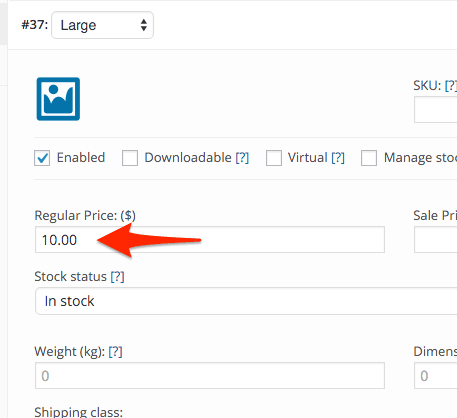
If you want to add the same price to all variations go to the Add variation drop down and select Set regular prices. Click the Go button. N.b Price is the minimum product data for each variation you need to enter.

A modal box will appear where you can enter the price for all variations. Click OK and it will apply them.
Remember to click the blue Update or Publish button in the top right corner to save your product.
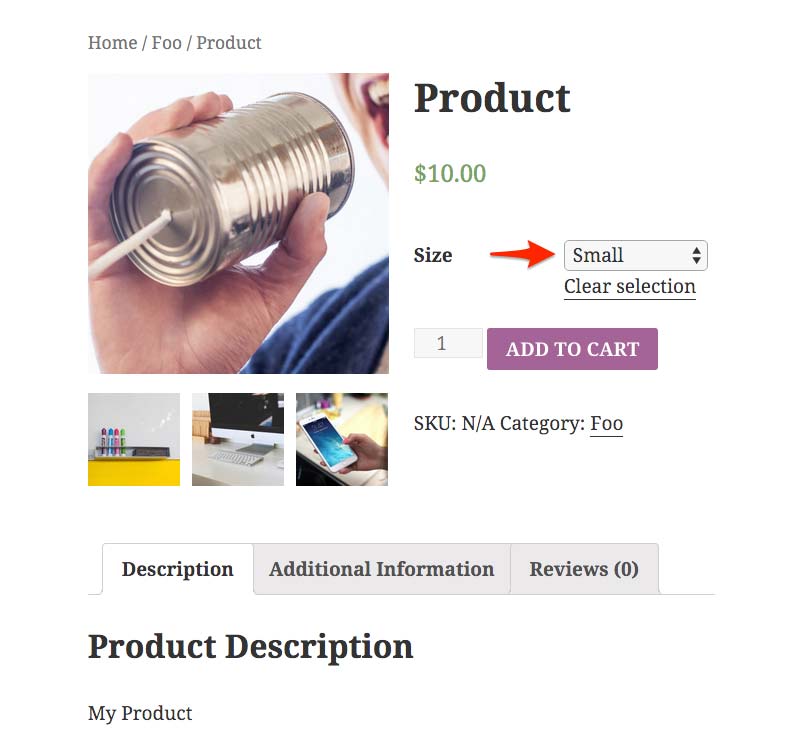
If we go to the front end of the site we can see our product have a drop down where the customer can select the size. N.b. If no option is chosen the Add to Cart button won’t be visible. It reappears once an option is chosen. So don’t worry if you can’t see it.
With variable products you can create many variations of your base product that customers can choose from.
FREE VIDEO TRAININGHow to increase sales and profit for your WooCommerce store
A simple 5 step plan to increase sales and profit for your WooCommerce store without wasting money on ads