Products are the main component of any ecommerce website. Setting up and maintaining products can be a headache on many ecommerce platforms. WooCommerce makes it easy to create and take care of many types of products.
I will go through adding a simple product. WooCommerce can handle many types of products. I’ll go through them in more depth in later posts.
The Products Area
Up until now I focused on the ‘WooCoomerce’ menu where the orders, reports and other global settings are changed.
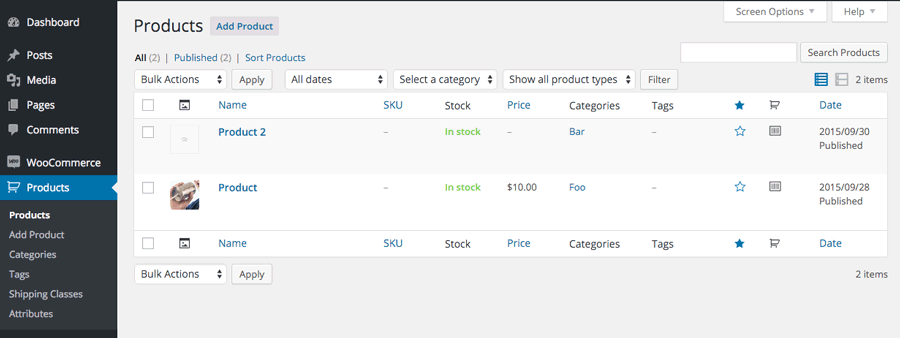
Underneath the WooCommerce menu is the Products menu.
Clicking on Products will show you all the products loaded into your store. To load a new product lick the ‘Add Product’ button near the top of the page.
This takes us to the single product page. It is like the standard WordPress Posts or Pages page but with some extra fields.
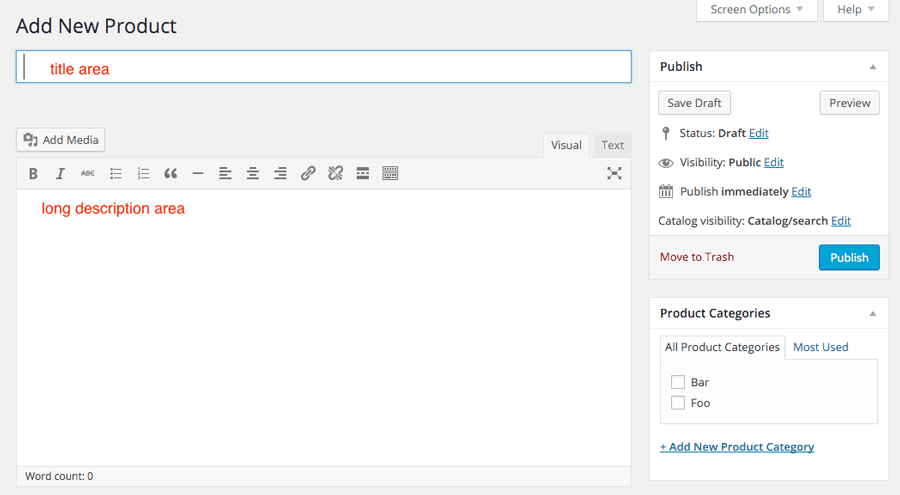
The first field you see is the title area. Type the title for your product in here. The main content area below it is the long description area.
Underneath is the Product Data area. Here is where you can configure your product. There are four types of products you can choose from.
- Simple Product
- Grouped Product
- External / Affiliate Product
- Variable Product

You can also have Downloadable products like software, e-books etc. There is also a checkbox for Virtual Products. These are products that don’t ship and aren’t physical. Like hotel rooms, courses, services etc.
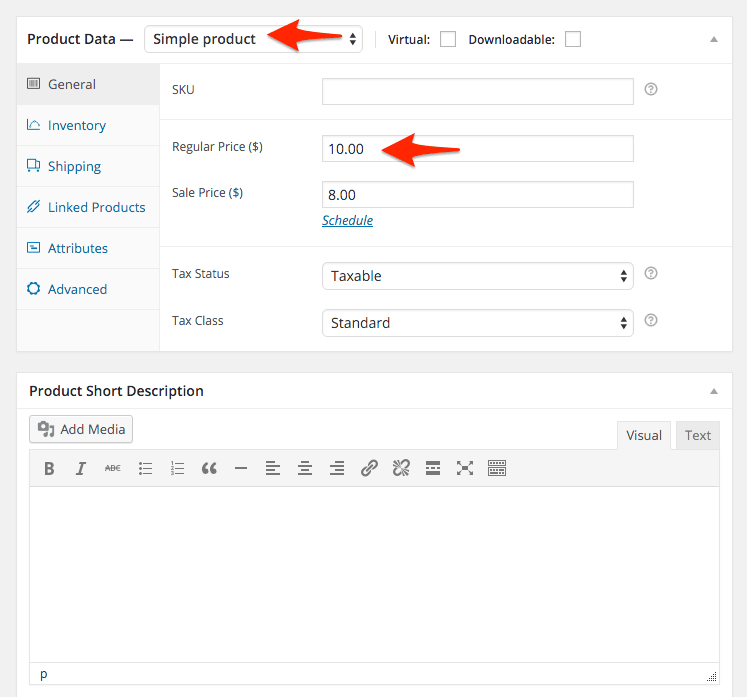
We are just creating a Simple Product. The minimum settings you need to enter here for a Simple product is the price.
The other fields are:
SKU. This stands for Shop Keeping Unit. It is a number or code assigned to that particular product to keep track of it.
Sale Price. You can enter a sale price. This will show the discount on the front end of the website too. You can schedule the sale price by clicking the blue Schedule link underneath the input field. You can choose dates the sale will run on, useful for holiday sales etc.
The Tax Status is where you can set whether the product is taxable. Choose between Taxable, taxing only the shipping or no tax.

Tax Class is where you can choose what type of tax is added. The types of tax that are available in the dropdown depends on what types of tax you have set up. The Tax settings are under the WooCommerce > Settings menu. Then go to the tax tab. Each type of tax needs to be enabled and set up. Check out my blog post on how to set up GST for New Zealand based sites if you are in NZ.

The other tabs on the side set up more complex things. We’ll go over that later in the post.
The final field is the Product Short Description. Content entered in here will be seen next to the product image on the single product page. As well as under the thumbnail in the product listing. (on most themes).
The Products Sidebar
This is a lot like the standard WordPress Posts or Pages sidebar.
First is the Publish box. The main difference here is you can set the visibility of the product. Click the Edit link next to ‘Catalogue Visibility’ to change the settings. You can choose between:
Catalog/Search. This setting will have the product show up in the catalogue and searches
Catalogue. This won’t show up in searches.
Search. Will show up in searches but not the catalogue.
Hidden. Hides the product. This is useful if you aren’t selling the product at the moment but don’t want to delete it e.g. seasonal products
Underneath you can add categories and tags just like a standard WordPress Post.
Product Images
You can add images of your products here. Product image is the main image for your product. This will be shown as a thumbnail in the product listings. It will be the first image of the product show when the customer goes to the single product page.
The Photo Gallery is where you can add extra images for the photo gallery. These are show as thumbnails under the main image on the single product page.
Both use the WordPress media gallery to choose the images. You can choose from available images of upload new ones.
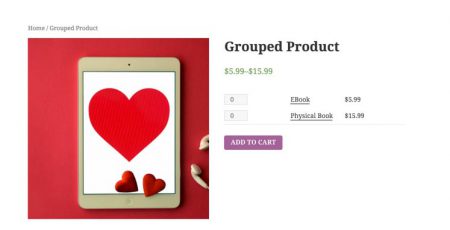
When we put in the title, descriptions, price, images, any tags or categories and publish we can see our finished product.
The Product Data Area
Using the tabs down the side of the Product data area we can set other data to do with our product.
Inventory Tab
Here we can set the stock management for the product. The are some global settings for how low stock is held before payment. The low stock threshold and more in the WooCommerce > Settings > Products area.
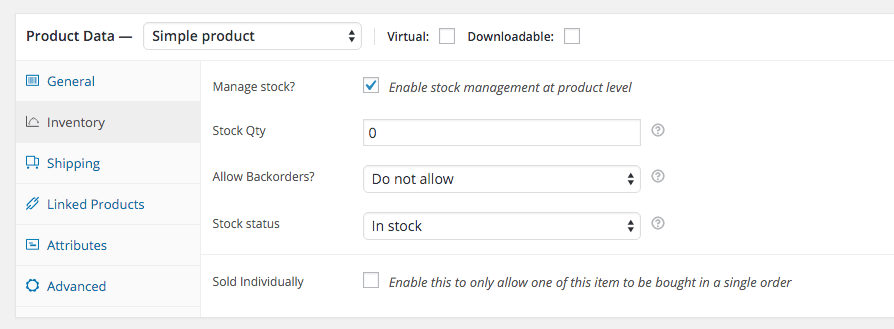
You can choose whether to manage stock on this product. Whether the product is in stock and whether the products are sold individually.
Shipping.
Here you can set the weight and dimensions of the product. They are shown on the front end of the site. They could be handy for customers to know. Some shipping extension plugins will use this data to calculate the cost of shipping.
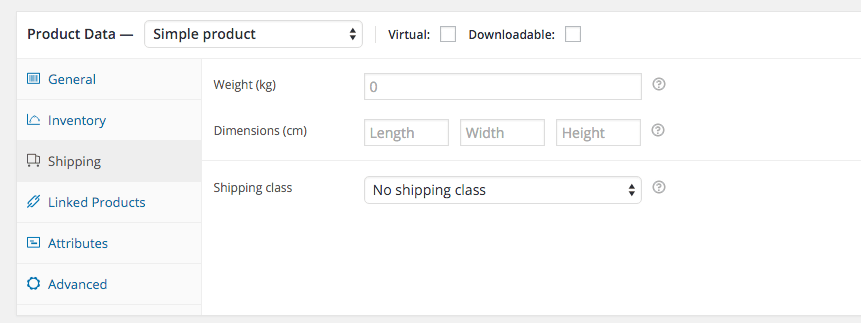
The Shipping Class dropdown allows you to assign a shipping class to this product. The Shipping Class is for calculating the cost. I’ll go over shipping more in depth in a later post.
Again, there are also some global settings for shipping that are set in WooCommerce > Settings > Shipping.
Linked Products.
You can choose products that compliment this product to display as Up-Sells and Cross-Sells.
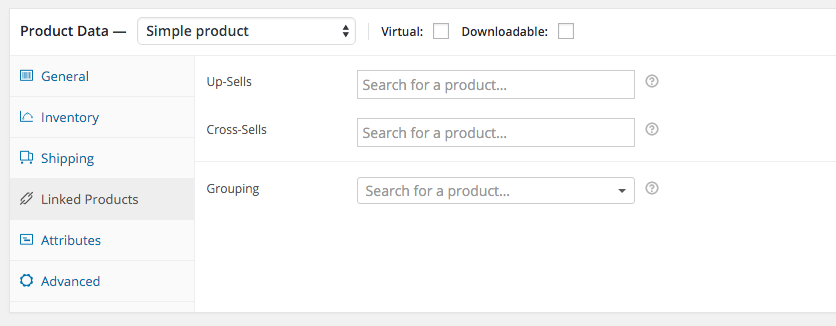
Grouped products are groups of products made of single products. eg. gift baskets. They need to be set up first. Then they will be available in the dropdown menu.
Attributes
Attributes lets you define extra product data such as colour and size. These must be set up first in the Attributes section.

Advanced
The final tab, Advanced is where you can add a purchase note that will displayed in the checkout to the customer. You can change the listing order of the product. eg. send it to the top or bottom of the listings.
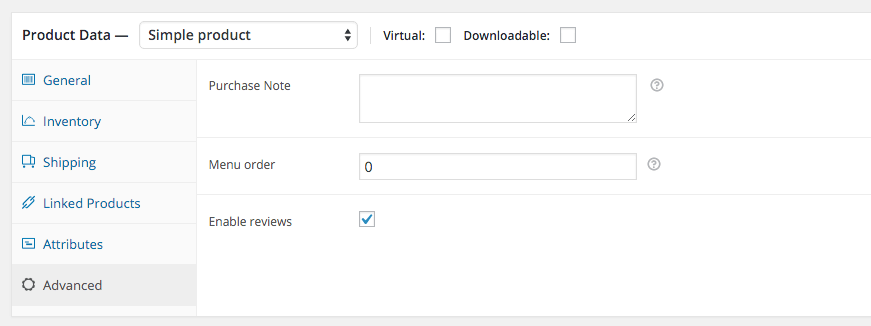
And lastly you can change whether reviews are visible on the product. Reviews can be turned on or off by default under WooCommerce > Settings > Products
In future posts I’ll elaborate on the different types of product you can create.
FREE VIDEO TRAININGHow to increase sales and profit for your WooCommerce store
A simple 5 step plan to increase sales and profit for your WooCommerce store without wasting money on ads