14/6/16 - To use WooCommerce and PayPal IPN from June 30th 2016 you will need to have an SSL Cert installed on your site. That means having a https connection rather than an unsecure http connection.
When starting an online store it is best to start with the most cost effective option first. WooCommerce ecommerce sites are easy and cheap to get up and running. When it comes to taking payments online PayPal is a good option and it comes built in to WooCommerce. This post will go over a few things that will help you get WooCommerce and PayPal working together smoothly.
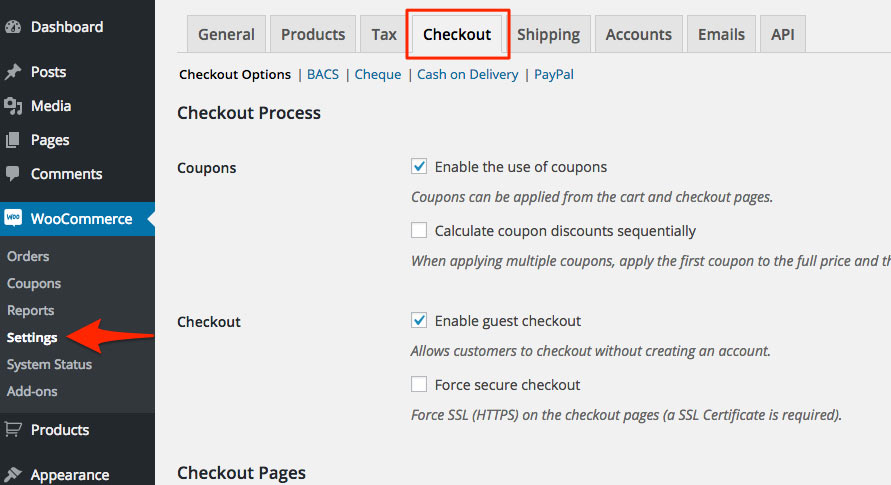
To set up payment options for your WooCommerce site, login to the admin area. Then go to Settings under WooCommerce in the left hand menu area.
Then click the ‘Checkout’ tab near the top.
This screen has an overview of Checkout options. If you scroll down to the bottom you can see the Available payment gateways. The options that are enable will have a tick next to them under the Enabled header.

You can change the order of priority of them. Just drag and drop them by the three lines next to the name of each.
To set up PayPal go to the top of the page and click the blue PayPal link underneath the row of tabs.
To enable PayPal make sure that the Enable Paypal checkbox is ticked.

There are some options to change the names and descriptions that are displayed in the checkout.
It make sense to leave it named as PayPal.
The description says 'Pay via PayPal; you can pay with your credit card if you don't have a PayPal account.'
Note: your PayPal account will need to be a Business account rather than a Personal account. You can choose which type you want when you sign up for PayPal. If you have a Personal account you can upgrade to Business.
The PayPal email is the email address you used to sign up for PayPal.
The next box allows you to enable the PayPal sandbox. If you are a web developer or if you have complicated product variations or shipping options you might want to use a sandbox to test payments. You need to sign up for a developer account to enable it.
If you have basic products it might be too much hassle. To test you can just create a very cheap product (20c) and do a purchase run through to test.
The Debug log can be useful for testing if things don’t seem to be working right.
Once you have set these settings PayPal should work after you make sure Instant Payment Notifications is on in your PayPal account.
The Advanced settings don’t need to be changed to take payments. But they can enable features like refunding customers from the Orders area of your site. I will go through the advance settings soon. To complete the basic setup you’ll need to turn on the PayPal IPN.
PayPal IPN.
WooCommerce needs PayPal’s Instant Payment Notification (IPN) function to be set up. It enables WooCommerce to be notified when a payment has gone through.
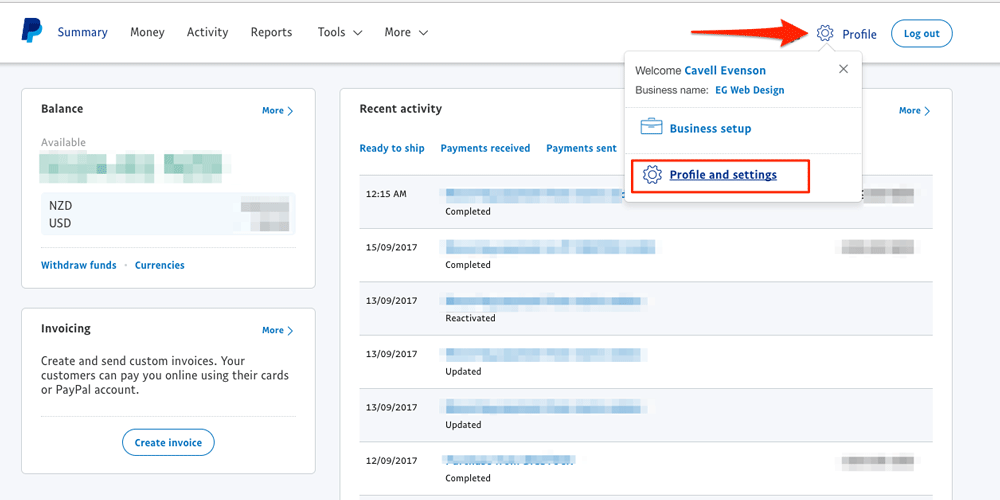
To set up the IPN log into your PayPal account.
Hover over the Profile menu item then click Profile and settings
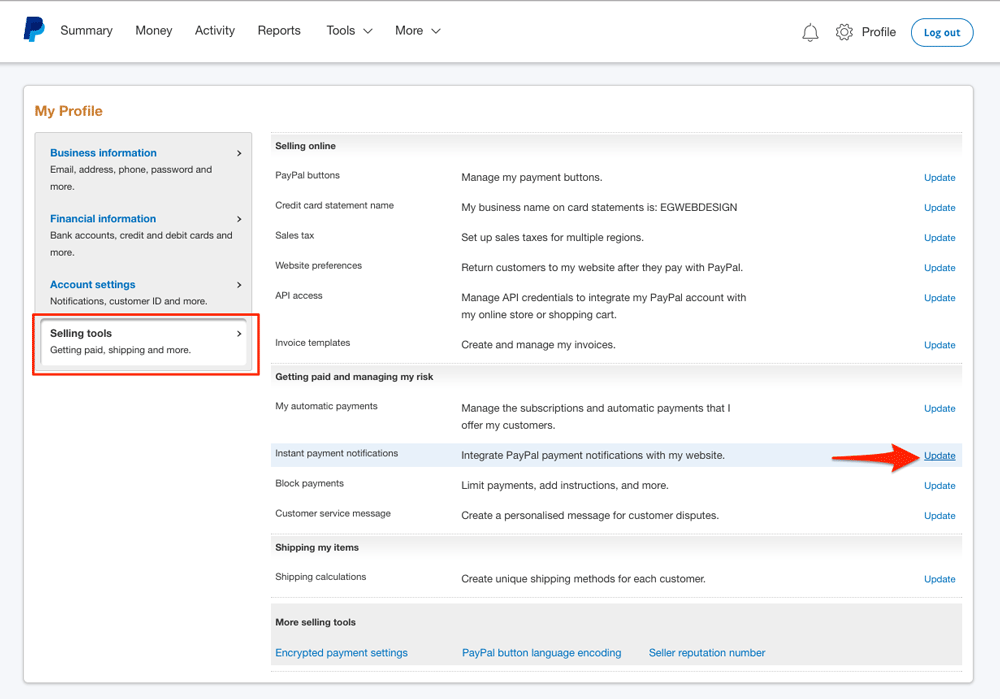
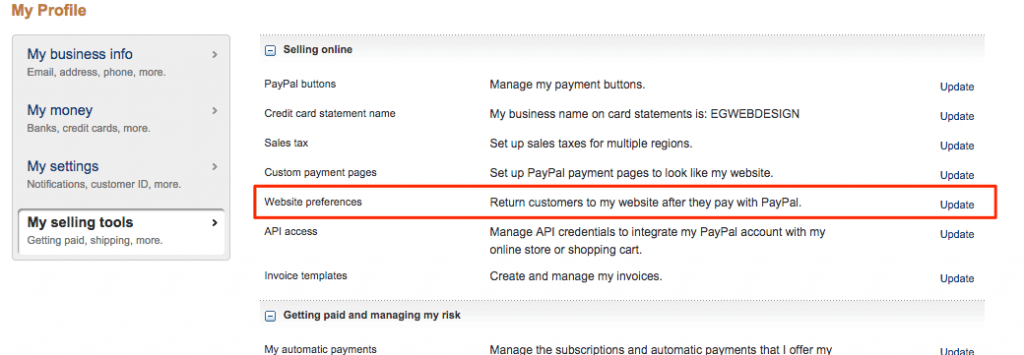
Then click on Selling Tools in the left hand sidebar.
This brings up a list on setting you can change. Go down to Instant payment notifications and click the update link on the right.
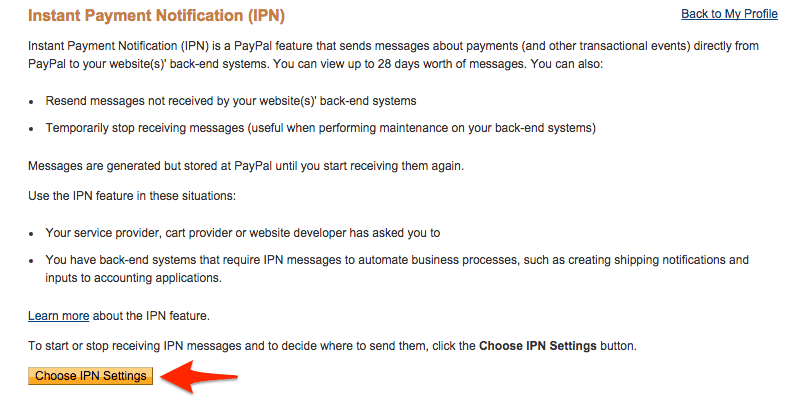
To set up the IPN click the Choose IPN settings button.
Here you need to enter the notification url. This is the url on your site that PayPal sends the notification of the payment to.
Enter:
http://example.com/?wc-api=WC_Gateway_Paypal
Replacing example.com with the domain name for your site.
Change IPN Messages to Receive IPN messages (Enabled) and click save.
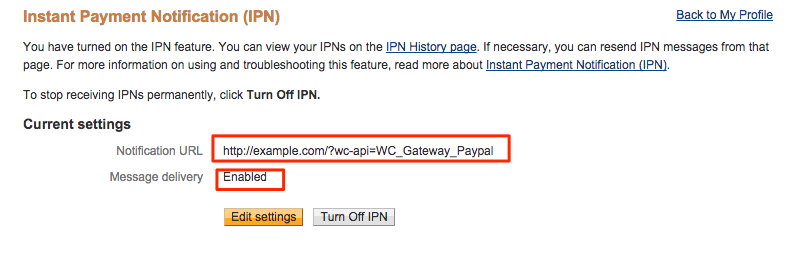
Your notification url should be saved and IPN will be turned on.
The last thing to set up is a return url. The return url is where the user will be sent after making the PayPal payment. Click on the blue update link to the right of ‘Website Preferences’.
Turn the Auto return radio button to ‘On’.
In the return URL area paste
http://example.com/checkout/order-received/
replacing example.com with your store’s domain name.
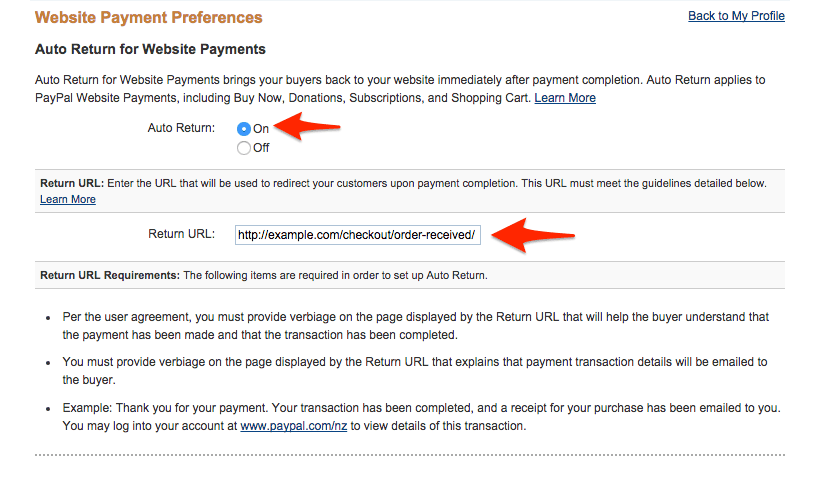
The rest of the settings can remain the same. Just make sure PayPal account optional is on.
Now you are ready to receive payments from your WooCommerce store to your PayPal account!
ps. There another way to connect WooCommerce with Paypal. You can connect via the PayPal Identity Token. And even set things up so you can give refunds for Paypal payments right from your WooCommerce dashboard.