Woocommerce makes starting your own online store easy.
This article will go over installed and setting up the basic settings for the plugin. I assume that you have WordPress installed already and know the basics of using it.
To download the plugin go to Plugins > Add New and do a search for WooCommerce. It should pop up in first place. Click the Install Now button to install the plugin.
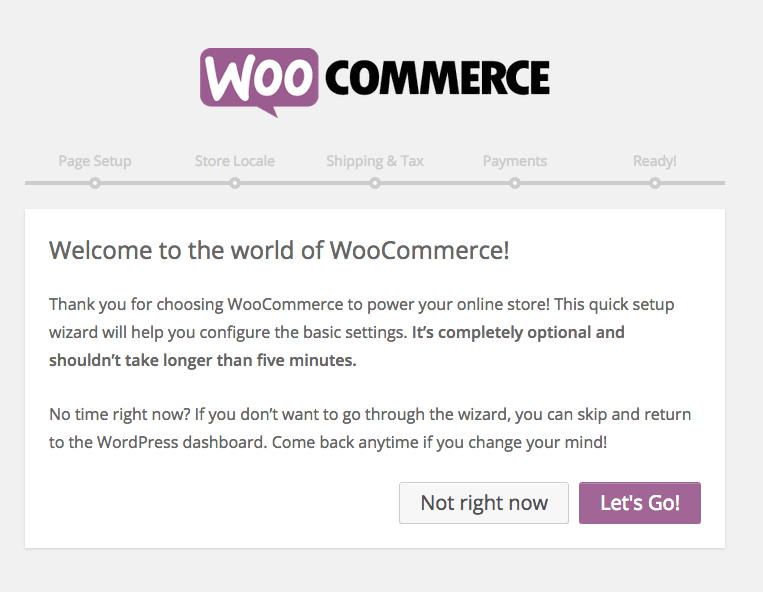
When you activate the plugin you will see the welcome screen where you can set up a few settings for your store.
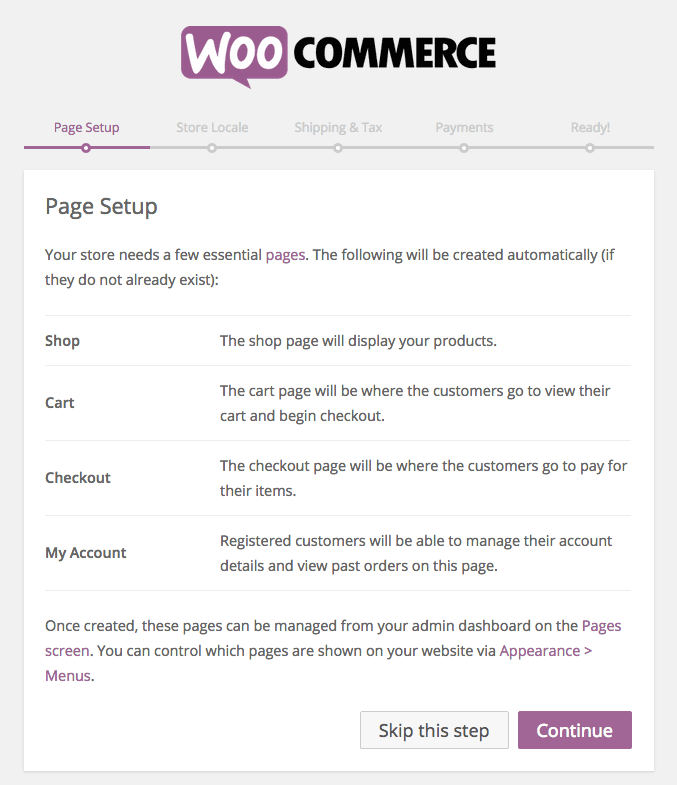
The first stage adds pages that WooCommerce needs to function. Unless you are experienced with WooCommerce you should just go with the default option. This will create pages for your products, account pages, checkout etc.
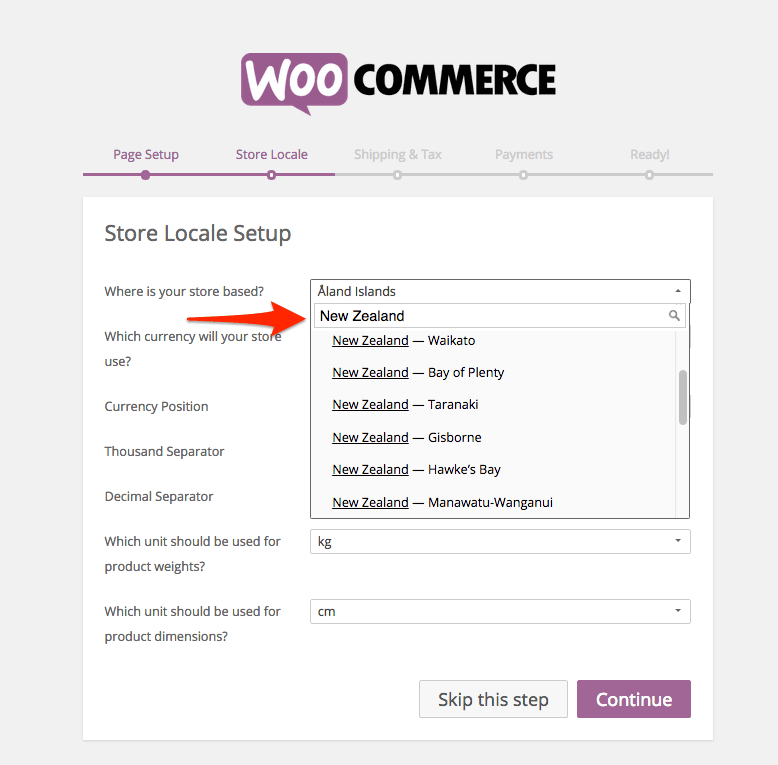
The next set up stage asks you where your store is located and your currency. You can also set the units that your store will use like miles or kilometers etc.
To set you store to a New Zealand location, click in the search field and begin typing New Zealand. All the main areas in New Zealand will show up and you can just choose where your store is based. This information will be used later for calculating shipping rates.
The next stage lets you add shipping and tax. If you don’t know how much you will be charging for shipping you can skip this and do it later. If you have complex shipping costs you can set them up per product or charge depending on weight. There are plugins that can help with calculating shipping costs per product.
You should enter whether your store will include sales tax (GST in New Zealand) in the price. You will be able to enter the tax rate later.

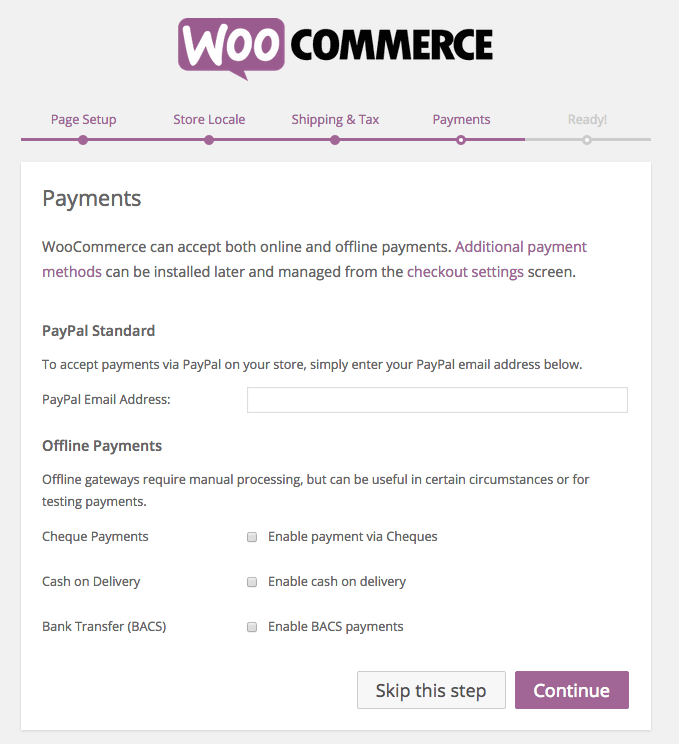
Next you can enter details for payment options. PayPal is a good option for people just starting with ecommerce. You can run a store with Bank Transfer payments but this does add more administration time to running a store.
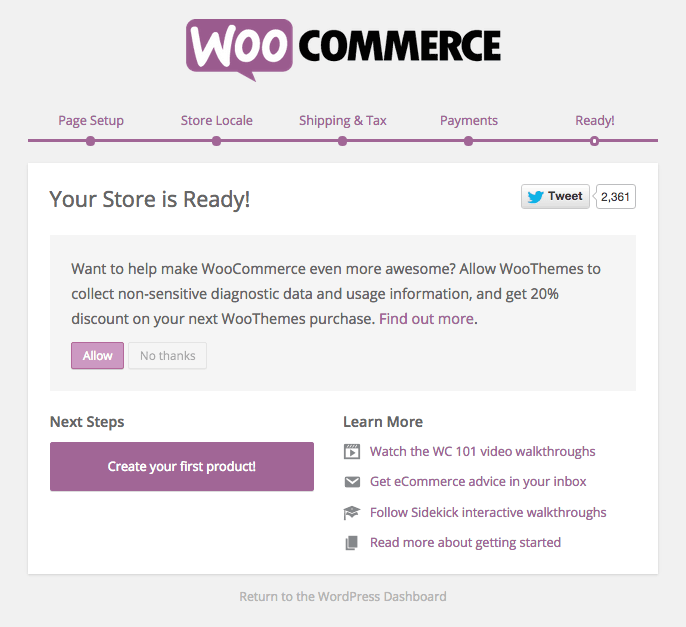
That’s it for the basic setup. The last screen will take you to set up your first product. There is a list of handy links on the right where you can learn more about WooCommerce.
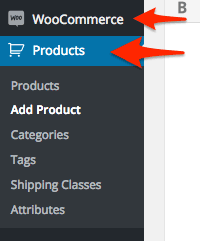
If you click the Add your fist product button you will go to the WordPress admin area. If you look on the left you can see two new additions to the menu. WooCoomerce, where you can find the orders, coupons, reports and settings. And the Product area where you can add Products, categories, tags, shipping and product attributes.
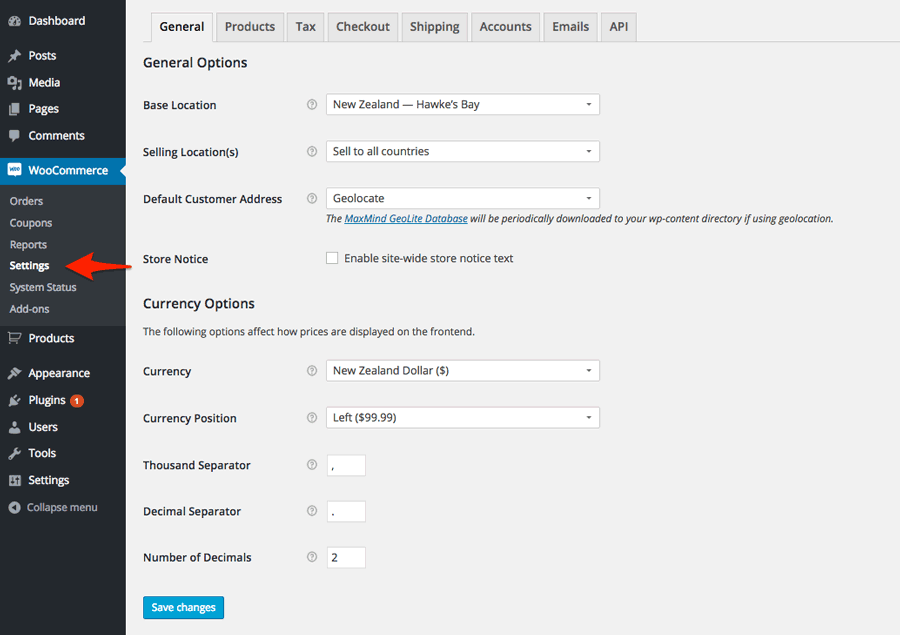
To further fine-tune your stores settings click on the Settings menu item under the WooCommerce heading.
In this area you can:
- specify which countries you want to sell to
- set up payment options
- set up global shipping options
- set up tax rates
- change user account options
and edit the notification emails customers will receive when they purchase a product or create an account.
I will go into some of these option in more detail in future posts.
Next time I will go through setting up GST for NZ stores and payment option and processors from a New Zealand point of view.
FREE VIDEO TRAININGHow to increase sales and profit for your WooCommerce store
A simple 5 step plan to increase sales and profit for your WooCommerce store without wasting money on ads